Sunday, March 3, 2013

Scharf-Fix-er upper

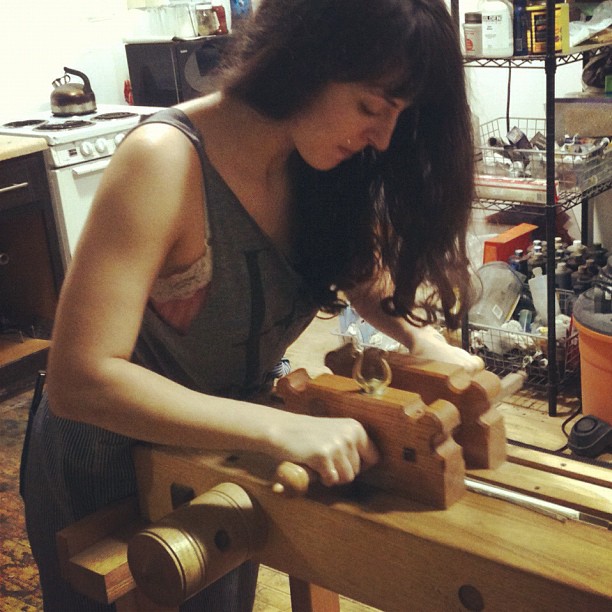
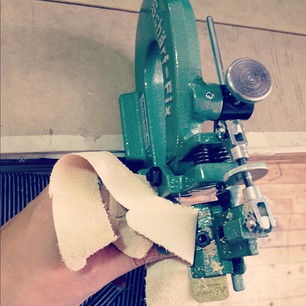
   What better way to spend a Sunday afternoon than learning how to shave leather? Thanks to the loan of a slightly wonky but totally usable scharf-fix (a la Paper Dragon Books + the generous Gavin Dovey) I am learning how to shave leather for books. This piece of machinery is basically a razor blade plane that mounts to a countertop. You basically just pull the leather through from left to right across a roller and blade, adjusting the height and angle of the blade to get a thinner shave. So far the Schar-fix is proving to be more than a little difficult to master, but I am determined to tame the little shrew. 

The basic idea is to mark (in pen) a one inch turn in across the top and bottom of a piece of hide, and then shave that down to 4 mm. Then gradually you level off/bevel/smooth the area between the turn in and the rest of the hide so it's a smooth transition. Once that's smoothed out you return to the edge and shave it down even further, to around 3mm, which is easier said than done.
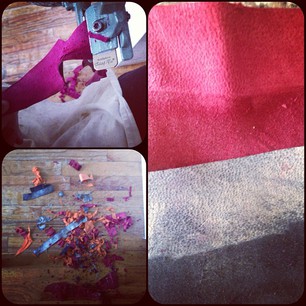
I'm practicing on some beautifully colored strips and more or less chomping at the bit to do a full leather binding. I just learned how to do leather corners (more on that once I try it first hand and snap some photos) so expect some information on that soon. In the meantime the shavings make a beautiful mess of colorful leather dust which I am desperately trying to think of a use for. Maybe I'll start a flocking project...


Monday, February 11, 2013

WINTER party


After a weekend of very appropriately time snow, last night my press, A Wrecked Tangle Press, had our book release party for our new open edition book WINTER. The party went off without a hitch and it was so satisfying to see everyone reading it. Writing/book binding can be a lonely process when you never get to see your work handled/appreciated! We did another raffle and this time the prizes were: An ostrich feather, pink Himalayan rock salt, a flask of whiskey engraved to say WINTER, a copy of our book, a photo album on white cloth with gray marbled endsheets, and lastly a mother-of-pearl handled vintage pocketknife with the word PONY on  the blade. 


All in all it was a night to be remembered, if nothing else than by the confetti we will be sweeping up and finding underneath furniture for months to come. 
If you would like to see the book or acquire a copy it can be found at www.awreckedtanglepress.com/winter


Wednesday, February 6, 2013

WINTER

A Wrecked Tangle Press is coming out with our new book, WINTER, which is an open edition printed on vellum and hot foil stamped white on white with the kensol. 


I'm pretty much in love with it, and excited for our book release party this coming Sunday. 


quarter binding how to!


Quarter bindings are an easy way to make a book cover pop visually because you can use contrasting colors and it gives it a sort of visual texture. Once you get  the hang of it they are a no brainer. I also have gotten into using marbled papers as the larger portion of the cover as opposed to using them as endsheets because you can conserve expensive paper and also you don't have to wait for endsheets to dry in the press overnight. 

To start simple get your case ready to build as you normally would, but when you cut the fabric cut a piece for the spine that covers about half the book cover. Glue it on like you normally would. It doesn't matter if the fabric on either side if exactly even because you will trim it back. Once you have the spine and boards attached and you've put the text block inside and made sure it's actually going to fit, you're ready to add the paper or fabric to fill in the rest of the cover. So, using a pair of dividers or even just a ruler, measure about 1/4 of the book into the cover, mark it, and cut on both sides. What you should be left with is a perfectly straight fabric strip holding the case together at  the spine. It should cover about 1/4 of the book cover, hence the name quarter binding. Because it takes the most pressure on the case, I wouldn't recommend using paper for the spine unless it was pretty strong. Now smooth out the board that has had fabric pulled off of it using a bone folder. Find a piece of paper that, when aligned next to the fabric spine, comes out flush. Test that when you put your cover fabric or paper against it the area feels flush to the touch. Take a ruler and measure/score just a hair onto the already glued fabric (in this case the yellow). Glue the bulk of the cover board, leaving about an inch nearest the yellow fabric not glued. Now, glue the edge of the marbled paper that will jut up against the yellow. Carefully line up the marbled paper so it just barely covers the mark you've scored, essentially covering the yellow fabric by not even an 1/8 of an inch. Once that edge is lined up, slowly lower the rest of the paper, being careful to push from left to right (spine to foredge) so any glue goes in the direction of the foredge and not onto your exposed cover. Be careful when you line the papers up to leave enough paper (about 3/4-1 inch) on the 3 remaining sides so you can turn it in. It's easy to get so concentrated on lining things up with the spine that you end up with most of the paper on one side, etc, which can be a pain later when you turn in. Also when bone folding hold the folder flat against the paper, not tilted, because that will press glue out onto the cover. Turn in the top and bottom first and the foredge last and repeat on the other side. Voila! 1/4 binding. It can even be an interesting touch to use different colored fabric/paper on both sides of the book. 

*If it is easier you can line the two fabrics or fabric and paper up without any overlap but I find that the slight overlap can still be perfectly flush and leaves less room for error, aka slivers of board to show through. 

Tuesday, February 5, 2013

L-O-N-E-L-Y C-R-E-A-T-U-R-E


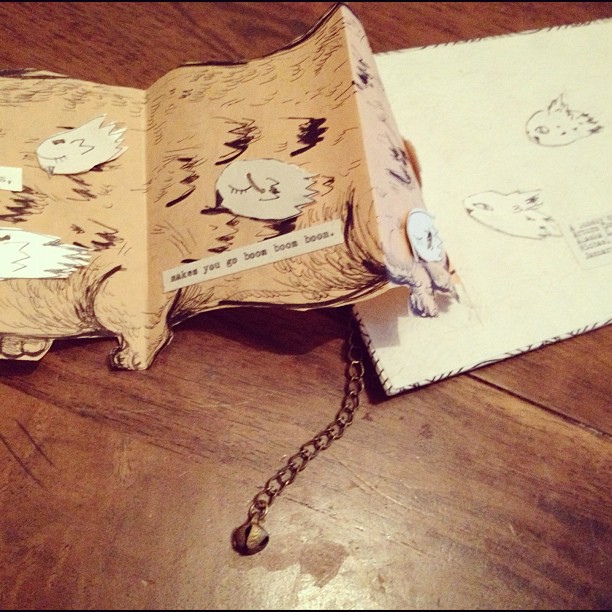
I just recently rediscovered this collaborative book Arturo Cordoba (Arturororo.tumblr.com) and Michael Martinez and I made together. We did all of the conceptualization and construction in one day. The lonely creature's body is the length of the accordion book and he has a three dimensional paper mask face on the cover as well as a chain and bell tail on the back. 

this is our year


Jessica and I got together and made these photo albums as new year's gifts. We even had a little plate made and stamped them on the kensol. The paper has an awesome reflective quality so it's gold in one light and blue in another. We used a blue marbled paper as endsheets.Albums are actually very easy to make. Basically the idea is to leave a cushion or padded area between pages so that the album will lay flat even after photos are added. If you don't do this, and add photos to a book, the foredge (side opposite the spine, or the side you thumb through) will become wider than the spine and create what some people call a "hungry book." Not a good look. 


To prevent that, measure out a small margin on the spine side of the book, about 3/4 an inch depending on the size of the pages. Score it with a ruler and sharp edged  bonefolder and then fold the tab in. When you sew the signatures (folded pages) together face all of the tabs in the same direction. It helps to press the signatures overnight under weights or in a nip press if possible, so they lay flat together. When you case in the book to its cover interleave (insert) pieces of the same weight of paper into the spaces left by the tabs before putting it under weight or in a press. This will prevent dimpling or creasing from the pressure on the tabbed areas. Another easy way to do this if you can spare the paper is to simply measure the tab on a full folded signature and then cut it, leaving you with a folded signature that has a 3/4 inch tab as well as a piece of paper to interleave that fits exactly. If you're feeling extremely bold you can even make the textblock (pages or signatures of the book sewn together) and score/cut off the area to the right of the spine. This scares me though so I'd rather do it the way I mentioned, and leave my mistakes to the side before binding. 

Tuesday, January 8, 2013

How to make an awl guide for sewing

To make an awl guide cut a thick paper (light weight map folder works best) to the same size as a (folded) signature in your text block. Figure out how many holes you need depending on what type of binding you are doing. Start by marking and measuring out the head, usually around 10mm. Mark inside the folded map folder with pencil. I like to write head and tail on the map folder to make sure I keep stacks of signatures going in the right direction. Then mark the tail, leaving a little extra room since usually the book is printed with more trimming room on the bottom. (10-15mm). To measure the middle of the two points you can take a piece of paper and line it up with both the head and tail pencil marks and fold it in half. An easy way to save time is to choose how many holes you need and then use that method of folding paper to get the middle of each point. (For 4 holes you would measure the middle between the head and tail, and then again take the middle of those points.) Once you have all the spacing marked simply use an awl to make a hole on either side of each marker. The space between should either be big enough to cover any ropes or binding strips you are using, or if you're just using thread about 10mm across. I like to cross of the middle dots that aren't perforated using an X (or erase them) so that I don't accidentally go through them later when I am perforating my signatures, which you are now ready to do. You can also save awl guides for later use. I like you label mine withe the project I used them on as a reference. 

Thursday, January 3, 2013

a little cheat for saving time and fancy paper on endsheets...

Lately I've been making hinged endsheets where the side that is glued down to the inside covers is fancy aka marbled etc, and the side attached to the text block is a plain paper that is the same on both sides, maybe even something with a little texture. This saves time because you don't have to wait for glued endsheets to dry in the press overnight, and you don't have to use as much fancy paper. It also looks really cool and kind of more mellow on the inside. Here is my current favorite color combo.

Tuesday, December 25, 2012

diamondback snakeskin book


I made this book by mounting a diamondback snakeskin to a marbled paper. I used straight PVA glue because the marbled paper is thin and expands a lot when wet. It helped to put wax paper on both sides of the paper before pressing it overnight in a nip press. The end result was a snakeskin overlayed onto a marbled paper with very little wrinkling. The skin actually came thin enough that it didn't need to be shaved before casing in and was able to be turned in over the foredge. On the sides where it was turned in (covering the rounded foredge) I did have to glue down the scales individually because they popped up. Otherwise a surprisingly easy book to do. The blue and gold marbled paper was meant to have a snake in the water vibe. The only problem I encountered was in getting the fabric of the quarter binding to  lay evenly against the snakeskin/marbled paper piece I jutted up. What I ended up doing was layering a piece of plain paper beneath the marbled paper and then cutting out the outline of the skin so that both the thinner marbled paper and the skin glued to the top were flush with the fabric. You can see my instructions on how to do a quarter binding to learn the rest. 

Friday, December 7, 2012

love the plough

I've become a little spoiled getting to use the plough to even off the edges of books. It's a little intimidating at first but once you get the hang of it the smooth edge is addictive, and takes some of the pressure off of binding it perfectly. Basically you just have to mark what side you want trimmed, put the text block between boards that are ever so slightly bigger with the margin to be trimmed exposed on the side facing you, and line it up in the press with the spine side facing you to begin. (Trim the foredge last.) The hardest part is getting it in the press with the margin to be trimmed evenly exposed/not tilted at all, etc. Though I will admit, I still can only plough in one direction, unlike Gavin who zips back and forth and at twice my speed. Someday!

Friday, October 26, 2012

craquelle


To make craquelle you need to mix a paste that is a  bit thicker than what you normally use to glue leather or combine with jade/pva. Paint it onto the leather in a stippling motion as if it were regular glue, but leave the clumps and uneven streaks. Then, blow-dry the leather until it is crispy and dry. Take a piece of totally dried leather with the paste still on it and slide it over the edge of a counter, like you would to get the wrinkles out of a dollar bill or crumpled paper. The pressure of sliding it across a ledge will cause veinlike cracks in the surface of the dried paste. Using a piece of cotton with dye on it quickly spread the color over the surface, keeping in mind that paste is water soluble so you need to be quick and not apply to much pressure or the paste will wash off and the color will blotch onto the surface instead of only sinking into the cracks. After that you want to blow dry it again until crispy and if you want to you can add another color on top (use lighter colors first). Take the fully dried piece of leather and wash it under running water until the pieces of paste have come off, then lay it over a larger piece of davey board. Using a mister/water spray can keep the leather wet while using a butter knife to scrape off the remaining paste. The end result should be a vein-like pattern of distinct and crisp lines of color on the otherwise untouched surface of the leather.

solo book

So I had a go at doing a book on my own without any help from Gavin. The rounding and backing could have been more even but it turned out okay, and for once there were no little errors when I hand tooled the cover with gold. This book was a journal/gift for Taylor McFadden. Bon Voyage!


Tuesday, October 16, 2012

inky


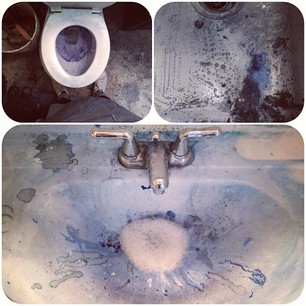
(studio blues)


end of an era

Finally! 
Cased in 17 copies of Of An Era (before lunch), thus finishing the edition at long last. Feeling good. 

Friday, October 12, 2012

Stingray leather


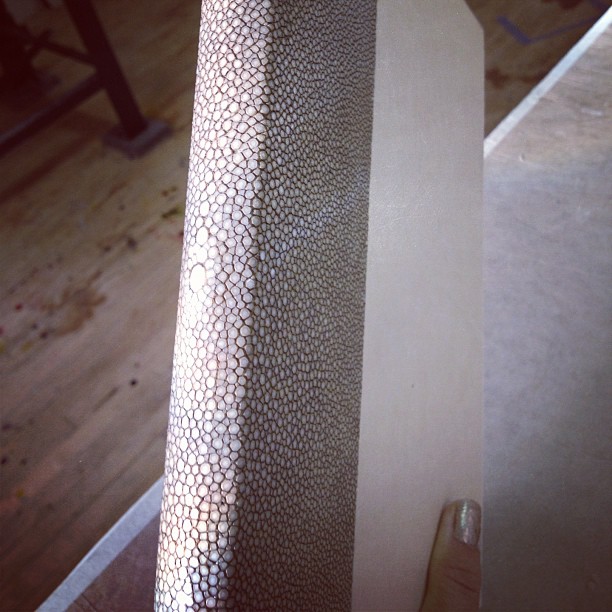
After many hours of sanding and paring we created this gorgeous stingray leather spine. It shines in the light as if it was underwater! The material of the white circles is the same basic composition as teeth which means that sanding this was very difficult. We ended up doing a combination of paring it with a knife, sanding it by hand and using a belt sander. For the joint we taped the skin over a piece of board to sand in the joint space.

Stripes


Here's a fun striped cover I did as a gift for my brother Judah.


Thursday, October 11, 2012

Shaving leather


First time casing in with leather


Sewing frame


Nothing like a freshly stacked couple of sewn books to get your day started right. 

RIP

RIP restauro 1024.

This was one of my favorite papers and I regret never making end sheets  with it.