godsoflonghand is the arrow through the arrow in the eye of the target.
Wednesday, May 30, 2012
finished!
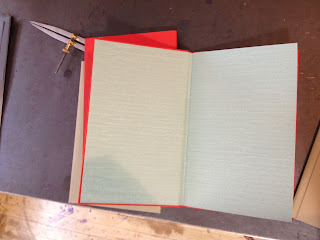
Taking the finished books out of the press, also known as the best/worst part. Not too many glue mistakes this time, and my favorite (the green end sheet with red book cloth) turned out pretty well. I learned the hard way with the psychedelic pink and yellow one that thinner paper expands more, so I should have maybe shaved a little sliver off the endsheet before gluing. Gavin taught me a cool trick for lining these ones up- since you can't press them against the spine as easily with a paper spine when casing in,you can glue the end sheet, turn it over, hold it at an angle with the foredge lower than the spine edge in order to line up the corner, then tip it down laying the aligned foredge first,followed by the spine.
 |
| (favorite) |
Monday, May 28, 2012
Thursday, May 24, 2012
Wednesday, May 23, 2012
how to thread a needle so it won't become unthreaded
It helps to flatten the thread with a bonefolder first so it is narrow and can be easily slipped through the eye of the needle. Then just rethread through the shank and pull down, creating a slip-proof tension on the thread.
how to do an all along stab sewn binding
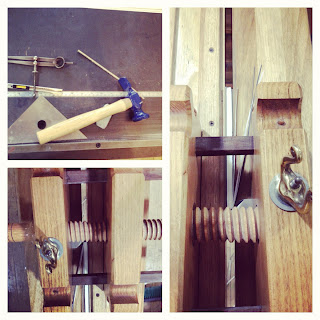
First things first, glue the spine. It helps to put the paper between boards and apply pressure. Once that's dried (10-15 minutes later) mark the head and the tail, leaving more room for trimming on the tail so about 10 mm in from the head and maybe 15 from the tail. Split the difference between that, and mark the center of those two points, and again marking the middle between the center and the head/tail marks. Then you can use a dremel to drill those holes, and remove the boards used to glue and drill. After that it's easy. Cut a length of thread 3x the height of the book and begin sewing by going down through the middle hole. If you have an even number of holes, you can just pick one to be the middle. Go up through the next hole to the right, and back down, etc, until you reach the end. The same looping stitch is carried back to the left with the exception that you skip the middle hole. On the return from the left you will thread back through the center from below, making sure that your needle and thread end up on the other side of the previous thread, so that you can knot the two over the thread from when you skipped the middle.(This is show in the bottom right square of the photograph). After you have knotted the two threads simply pull the needle and thread back through to the bottom and, if you're lucky, the knot will pull in with it and become invisible. Either way, you can trim off the ends and get ready to case in your all-along stab sewn book.
Monday, May 21, 2012
Wednesday, May 16, 2012
1 in a 1,000
Some of the work from A Wrecked Tangle Press, which I've been collaboratively running with Jessica Elsaesser for over five years, is featured in the upcoming publication 1,000 Artist's Books, scheduled to hit the shelves in June 2012.
http://www.facebook.com/1000ArtistsBooks
Tuesday, May 15, 2012
how to tie a slipknot
Monday, May 14, 2012
sharp is safe
There's nothing like a new knife. (Thanks Gavin!) In this case a paper cutting blade that is sharp on one side, and is basically begging to be engraved with my wood burner. I'm working on plans to make a case for it.
the wait
Finally got to take the first book out of the nip press and it looks great. I'm excited to try some of these new tricks on my own, like making a gauge to help expedite the process of spacing the spine just the right distance from the boards.
Wednesday, May 9, 2012
confetti
I'm still getting used to reading the ruler on the board sheers, and trying to relearn adding fractions. Still, this beauty makes things straighter and faster.
Tuesday, May 8, 2012
Monday, May 7, 2012
Slipcases
First day at PDB...
We worked on slipcases and made four models with circular recesses in the covers. I can't believe I've never made a slipcase before. This reminds me of a project I did a few years ago where every piece of writing came in a different container. In other words, my obsession with containers and the time it takes to make one slipcase might mean trouble.
We worked on slipcases and made four models with circular recesses in the covers. I can't believe I've never made a slipcase before. This reminds me of a project I did a few years ago where every piece of writing came in a different container. In other words, my obsession with containers and the time it takes to make one slipcase might mean trouble.
Subscribe to:
Comments (Atom)


.JPG)
.JPG)


.JPG)


